Calendars: create and share
Open Calendar in the webmail top bar. On the left you see the month and the list of your calendars; in the centre, the events. At the top you choose the view: Day, Week, Month or Agenda.
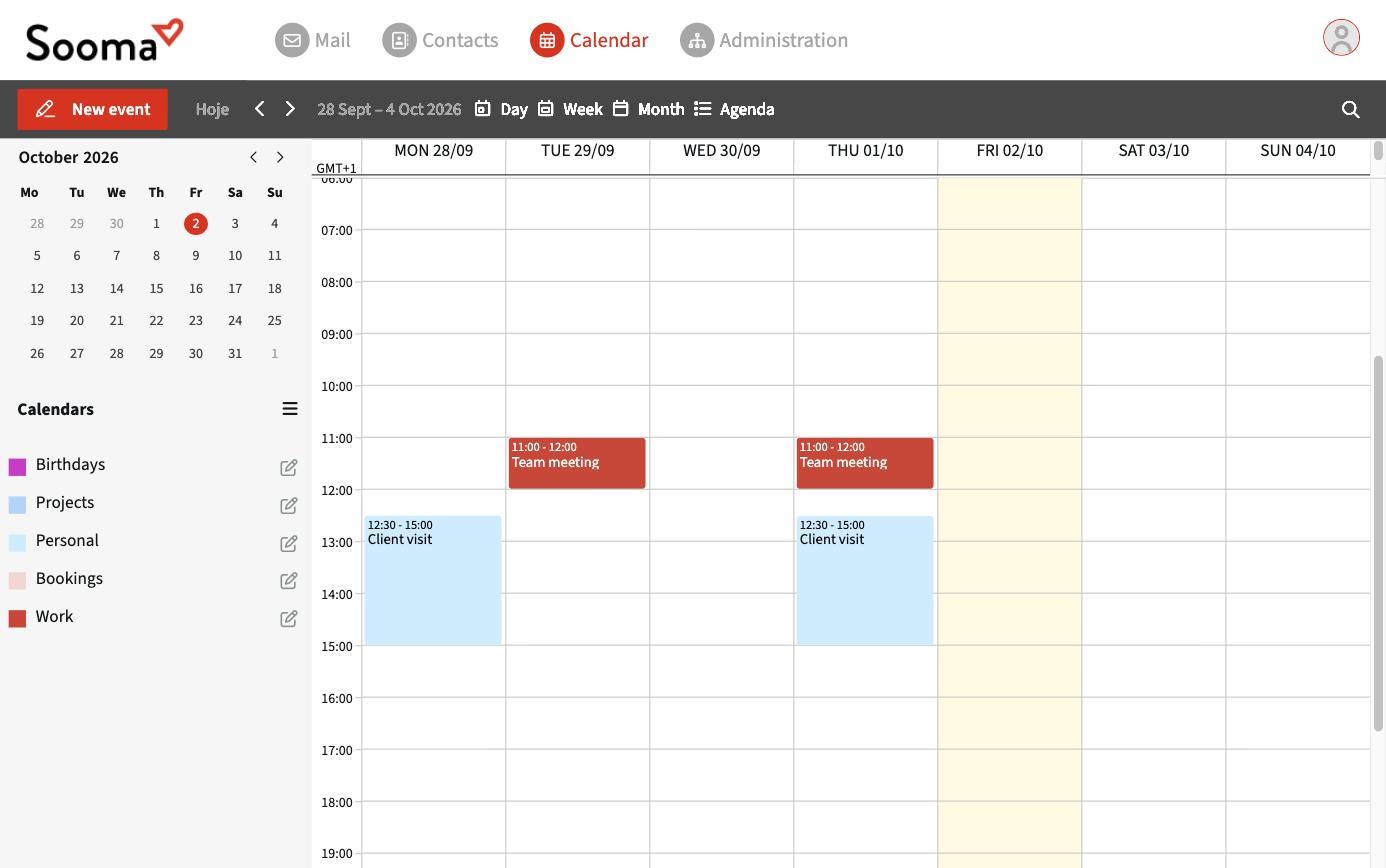
Each calendar has a colour. Click the colour square to show or hide that calendar's events.
Create a calendar
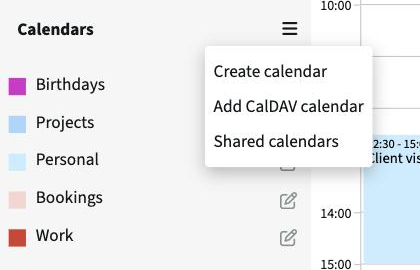
Click the ☰ icon next to Calendars and choose:
- Create calendar — a new calendar in your mailbox (for example Projects or Team holidays).
- Add CalDAV calendar — subscribe to an external calendar through its CalDAV address.
- Shared calendars — see the calendars other people have shared with you and choose which to show.
Share a calendar with colleagues
- Click the pencil next to the calendar.
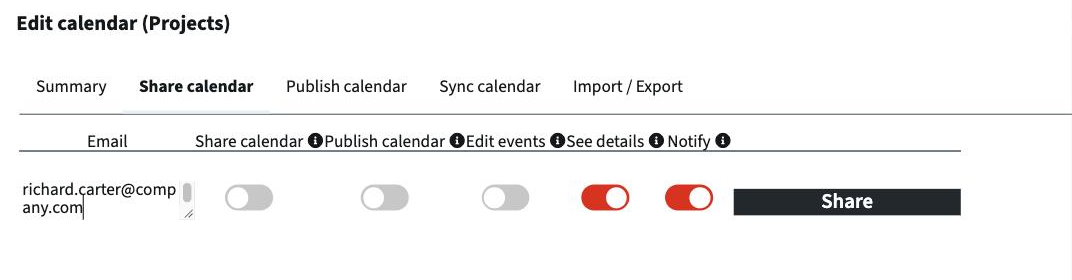
- Open the Share calendar tab.
- Type the person's email and choose the permissions:
- Share calendar — the person can share it with others.
- Publish calendar — the person can create public links.
- Edit events — the person can create and change events. Without it, they can only view.
- See details — they see title, location and description. Without it, they only see busy periods.
- Notify — sends the person an email about the share.
- Click Share and then Save.
To remove access, return to this tab and remove the person from the list.
Publish a calendar
On the Publish calendar tab you can create two links:
- one that publishes all the information about the events;
- another that publishes free/busy only, useful to show your availability without revealing the content.
Anyone with the link can see the calendar. Share it with care.
Other options
- Summary — name, description, colours and default event visibility.
- Sync calendar — create a dedicated CalDAV access for this calendar. See Sync.
- Import / Export — see Import and export.
- Delete calendar — deletes the calendar and all its events.