Rules and filters
Filters run on the server when the message arrives. They work even with webmail closed, and the result is visible on every device.
Create a filter
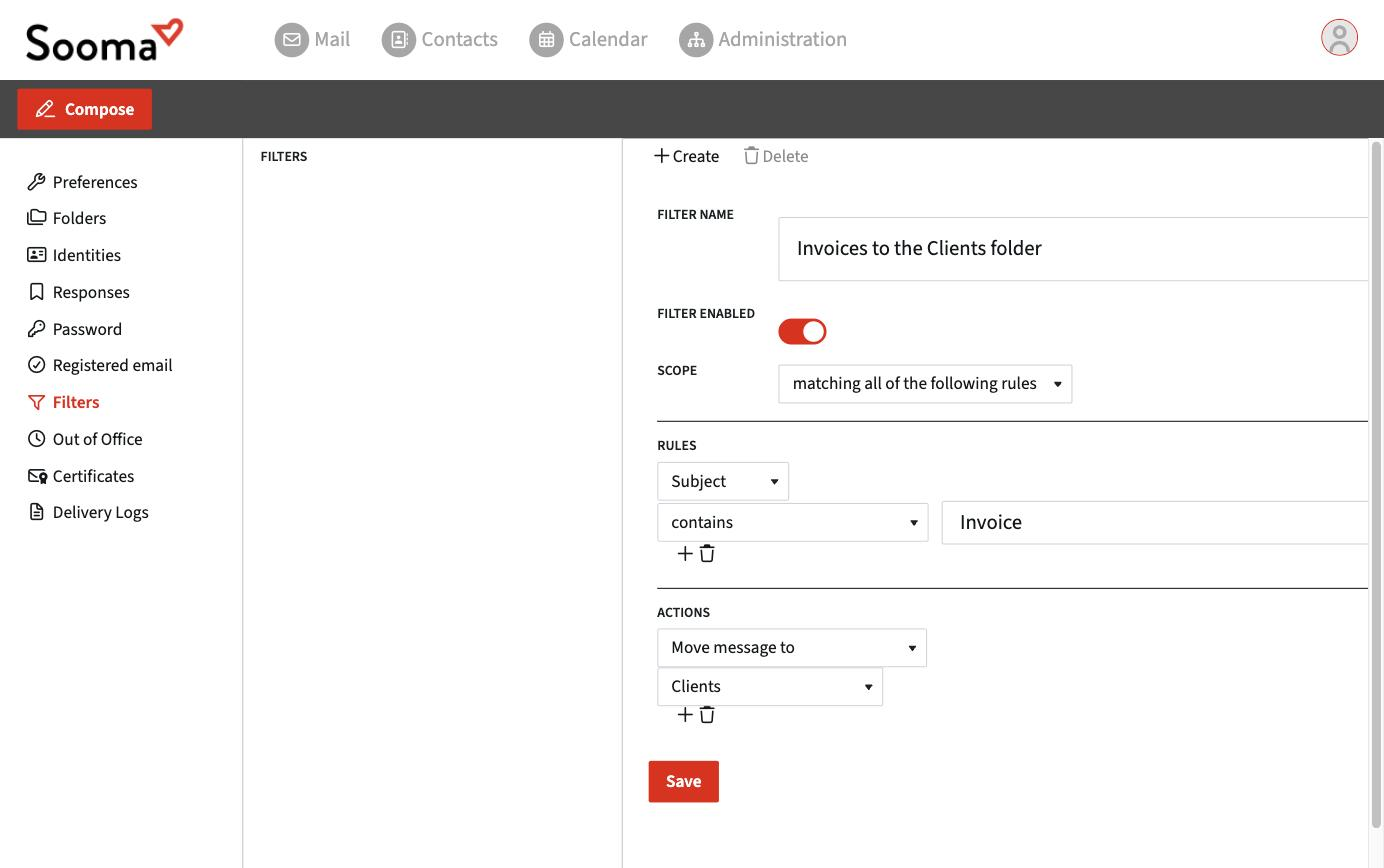
- Open Preferences > Filters.
- Click Create.
- Give it a Filter name that will help you recognise it later.
- In Scope, choose whether the filter applies when the message matches all of the following rules, any of the following rules, or all messages.
- In Rules, choose the field (Subject, From, To, Body, Size, Date…), the condition (contains, not contains, is equal to, exists…) and the value. Use + to add more rules.
- In Actions, choose what to do with the message. Use + to add more actions.
- Click Save. The filter is active straight away (Filter enabled switch).
Available actions
- Move message to / Copy message to a folder.
- Redirect message to / Send message copy to another address. See also Forwarding messages.
- Reject with message — returns the message to the sender, with the text you enter.
- Reply with message — an automatic reply only for messages that match the rules.
- Delete message.
- Set / Add / Remove flags — for example, mark as read or flagged.
- Keep message in Inbox and Stop evaluating rules, to control the order.
Useful examples
- Invoices to a folder: Subject contains "Invoice" → Move to Invoices.
- Newsletters marked as read: From contains "newsletter" → Add flags Read and Move to Newsletters.
- Large messages: Size greater than 10 MB → Send message copy to another address.
You can also create a filter from a message: open it and choose ⋮ > Create filter. The form opens already filled in with the sender and the subject.
Filter order
Filters are evaluated from top to bottom. Drag them in the list to change the order. If a filter moves the message, the following filters are still evaluated, unless you add the action Stop evaluating rules.